 Portfolio / Inventory (Web Site Design)
Select subject matter for your project, write a short design brief explaining what the project will be and why it will exist. Include a statement about the audience for the site. Create a mind map around the topic of your site. If you choose to create a personal portfolio site, brainstorm your personal brand qualities as a designer or artist. Use the ideas you generate here in sketched exploration. Put pen to paper, but also try things out in Photoshop. Sketch specific pages or screen views. Think about the means you will use for implementing your designs as a functioning site. Create a sitemap in Illustrator or InDesign to show the navigational structure of the site. Create the visual design of your site using Photoshop. Pull together rough digital comps of 3 different directions. Select one and finalize the design. Slice and output all necessary graphics. Assemble your site in Dreamweaver using div tags and CSS.
 Graphic Book (Vector + Raster Graphics)
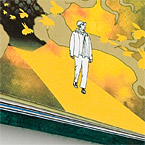
The last half of the quarter will be dedicated towards a single project, the creation of a graphic book. This can be a traditional book structure or something more experimental. The content of the book should be largely graphical in nature, but may include some text. Using text as an image is also a possibility. The subject matter is entirely up to you as well as its execution, however you are required to use both Adobe Photoshop and Illustrator in some capacity.
Think through your concept. Do research, brainstorm, collect influences. Write a brief of your concept. In a short paragraph, explain what your message will be, why it’s interesting to you and how it will come to life. Create a mind map or several with your concept(s) in the center(s). With the words and ideas that surround it in mind, start sketching ways to communicate your concept in words, illustrations, photographs, textures… How will it play out over a series of pages, how does your story unfold? Collect source material to use in your book or to use as inspiration. Move your sketched ideas into the computer, scan in drawings, work with photos digitally, create line art and set type. Create mock-ups as you go so you are always thinking about this project as something that will ultimately be a physical object. Look at graphic books in the library and in the special collections holdings of artist books for inspiration.
 Image Progression (Vector + Raster Graphics)
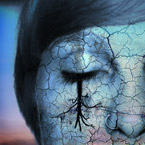
Think of three words or phrases that communicate the passing of time when read in order. These can be quite literal or metaphorical. For example: Morning/Noon/Night, Conflict/Confrontation/Resolution, Vetted/Selected/Elected. Really any combination is fine as long as there is a sense of progression from the first word to the third. You will be creating a discrete design for each word using only Photoshop. Use your own photographs, scan in drawings and found textures; the more creative your source material is, the more inventive and unexpected your solutions will be.
 S,M,XL: Icon, Pictogram, Illustration (Vector + Raster Graphics)
Pick an object which holds interest for you, something with some level of visual complexity. Preferably the object will be portable, if not document the object thoroughly with digital photos to share with the class. Animal, vegetable, mineral… anything is ok, as long as you feel there is enough to work with visually. Sketch your object from a minimum of 6 angles, as you are drawing, think of ways you could simplify the form, exaggerate its presence and articulate its reality… basically, how could you render this object as a small, medium and XL design. Create the three renderings of your object in Adobe Illustrator. Make at least 3 alternate designs for the small and at least one alternate for the medium design. As these files will be vector based, they will be scalable. The small design should work visually when printed at .5 inches tall, the medium design at 1.5 inches and the XL design at over 3 inches, this can be as detailed or stylized as you wish.